

A double vanity transforms a basic bathroom into a functional, guest-friendly space. Rental properties that attract longer-term visitors benefit greatly from this upgrade. Guests staying for weeks need room to spread out their toiletries and personal care items.
Property owners in Oklahoma have discovered that bathroom upgrades directly impact guest satisfaction scores. A cramped single sink creates frustration for two people sharing a space. Adding a second sink solves this problem quickly and efficiently.
This guide walks you through every step of adding a double vanity to a rental bathroom. You will learn about planning, plumbing, installation, and finishing touches. Follow these steps carefully, and you will complete this project with confidence.
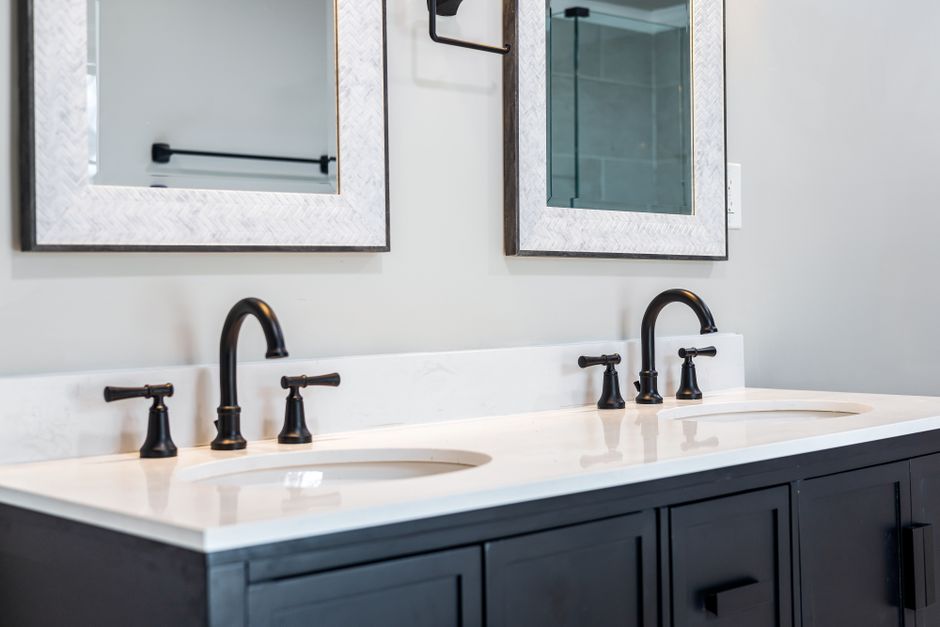
Planning Your Double Vanity Project for Extended Stay Bartlesville OK Rentals
Start by measuring your existing bathroom carefully. You need at least 60 inches of wall space to install a standard double vanity comfortably. Some compact double vanities fit into 48-inch spaces, so measure before you shop.
Check your current plumbing layout before purchasing any fixtures. Locate the existing drain line and water supply lines. Understanding their positions helps you determine how much new plumbing work your project requires.
Guests at best extended stay in Bartlesville OK properties expect functional, modern bathrooms. A double vanity signals quality and thoughtful design. Renters who stay for extended periods notice every detail of a bathroom’s usability.
Choose a vanity style that suits your rental’s overall design. Freestanding vanities offer easier installation than built-in cabinetry. Floating vanities create a modern look and make floor cleaning simpler for housekeeping staff.
Budget carefully for this project. A mid-range double vanity costs between $400 and $1,200. Add plumbing labor costs, which typically run $200 to $600 depending on your local market and project complexity.
Gathering Your Tools and Materials
You will need specific tools before starting this installation. Gather a pipe wrench, adjustable pliers, a drill, level, and measuring tape. Keep Teflon tape, plumber’s putty, and silicone caulk within reach throughout the project.
Purchase shutoff valves, supply lines, and a P-trap kit for each sink. Buy these items before removing your old vanity. Having everything on hand prevents frustrating mid-project supply runs.
Turn off the water supply at the main shutoff valve first. Open the existing faucet to release pressure in the lines. Place towels beneath the sink cabinet to catch residual water during removal.
Removing the Old Vanity
Disconnect the water supply lines using an adjustable wrench. Loosen the slip-joint nuts on the P-trap by hand or with pliers. Place a bucket beneath the drain before loosening these connections to catch standing water.
Locate the screws or adhesive holding your vanity to the wall. Remove all mounting hardware carefully. Slide the old cabinet away from the wall slowly, watching for any hidden plumbing connections you might have missed.
Inspect the wall and floor after removing the old unit. Look for water damage, mold, or soft spots in the subfloor. Address any damage before installing the new vanity to prevent costly future repairs.

Installing the New Double Vanity Cabinet
Locate the wall studs using a stud finder. Mark their positions clearly with a pencil. You will anchor your new vanity cabinet directly into these studs for maximum stability and safety.
Position the new vanity cabinet against the wall. Use a level to confirm it sits perfectly straight. Shim the base if your floor is uneven, which is common in older rental properties throughout Oklahoma.
Drive screws through the cabinet’s mounting rail into the wall studs. Use at least two screws per stud location. Tug the cabinet firmly after securing it to confirm it does not shift or wobble.
Install the countertop according to the manufacturer’s instructions. Apply a thin bead of silicone caulk along the top edge of the cabinet. Press the countertop firmly into place and allow the caulk to cure fully before proceeding.
Connecting the Plumbing for Both Sinks
Install individual shutoff valves on both the hot and cold supply lines for each sink. Wrap all threaded connections with Teflon tape before tightening. This simple step prevents drips that can cause significant water damage over time.
Connect the supply lines from the shutoff valves to each faucet. Hand-tighten connections first, then snug them with a wrench. Avoid over-tightening, which cracks fittings and causes leaks beneath the cabinet.
Install the drain assembly and P-trap for each sink individually. The P-trap holds water that blocks sewer gases from entering the bathroom. Connect both drain lines to a shared drain stub-out using a sanitary tee fitting.
Turn the water supply back on slowly after completing all connections. Check every joint carefully for drips. Run both faucets simultaneously to test water pressure and drainage flow before calling the project complete.
Finishing Touches That Guests Notice
Apply a clean bead of silicone caulk where the countertop meets the wall. Smooth it with a wet finger for a professional appearance. Allow 24 hours of curing time before guests use the bathroom.
Install matching hardware on all cabinet doors and drawers. Consistent hardware choices create a polished, intentional design. Guests at extended stay Bartlesville OK properties appreciate bathrooms that feel complete and well-maintained.
Add a mirror above each sink to maximize the vanity’s functionality. Two separate mirrors work well, but one large mirror spanning both sinks also looks excellent. Good lighting above the mirror area makes morning routines easier for guests.
Consider adding an outlet strip inside the vanity cabinet for guests to charge devices. Many extended stay Bartlesville OK visitors travel with multiple electronics. A thoughtful interior outlet adds convenience without cluttering the countertop surface.
Install drawer organizers inside the cabinet to help guests store personal items neatly. Small organizational touches signal that you care about guest experience. Extended stay Bartlesville OK renters who stay for weeks value storage space enormously.
A double vanity upgrade consistently ranks among the highest-return improvements for rental bathrooms. Property owners who complete this project report higher guest ratings and increased repeat bookings. Guests remember bathrooms that work well for two people sharing a space.
The entire installation typically takes one to two days for a skilled DIY homeowner. Hiring a licensed plumber speeds the process and ensures code compliance. Either approach produces a bathroom that serves extended stay Bartlesville OK guests far better than a cramped single-sink setup.
Document every step of your installation with photos. Keep records of all materials, model numbers, and plumbing configurations. This documentation helps future contractors service or repair the vanity quickly and accurately.
